Monday, March 21, 2011

Banshee @ EA Autoworks And Some Points About Rear Anti-Roll Bars

March 19th 2011 was a rather gloomy day… its been raining for hours.. and it didn’t look like it was gonna stop any time soon.

But still, me and a fellow LYN forumer by the nick of madman20 wanted to go to a car audio and performance shop in Bukit Jalil called EA Autoworks. From what I can remember, this is a shop started by 3 colleagues who used to work for a different accessories shop. At the time they advertised their services for their former workplace rather aggressively online. Offered very reasonable prices and from feedbacks, very good workmanship and support. In the end, for reasons unknown, the 3 of them left the company and started their own which is EA Autoworks. Some of you may know their nicks online which are drexchan, khguan and howiechoo.

The main reason I wanted to go there is coz I wanted to check out the Civic FD2 (Non-R) rotors from a brand called “Imp” (subbrand of Improve, I’m sure, by looking at the logos) to see if they were a good replacement for my current Prelude BB1 front rotors which I think are warped. Yes, I get the “right” vibrations at the steering when heavy braking. Anyway, the Imp rotors are vented, slotted and cross-drilled and are priced at RM5xx.

The BB1 rotors are 282mm and so is the FD2. But the FD2 originally comes in 5x114.3 lug pattern while the BB1 are originally 4x114.3. My BB1 front rotors have actually had their lug pattern re-drilled to 4x100. From a simple quick look, the FD2 rotor looks like itll fit (if re-drilled to 4x100)….but to get proper confirmation khguan suggested that when I have the moolah, to head back to EA, remove my BB1 rotors, do a side by side comparison. And if it’ll fit, pay a deposit, he’ll send them to a machine/engineering shop to get them re-drilled to 4x100 and install it when it gets back.

I’m still looking around for other possible solutions. I’ve found VTTR rotors for FD2 at Kakimotor for RM750. The VTTR are vented, and slotted only. But the sexiest part about them is that they’re black…and I mean BLACK. Not sure if the black would actually last a few meters of braking…but I seriously doubt it. Im pretty sure ull end up with silver rotors ha ha ha… Unfortunately, the staff at Kakimotor isn’t sure about whether or not the VTTR can be used to replace BB1 rotors. And theyre not the type of shop that would make the offer that khguan did which is removing my rotors just to check. And if I get khguan to remove my rotors, check and its ok, it really wouldn’t be nice of me to be buying the rotors at Kakimotor right? So we’ll wait and see…I’m still on the hunt.

Another reason I went to EA is to get my new (well, newly bought but used) rear anti-roll bar installed. Yes yes, I already have the Ultra Racing ARB installed but this was an upgrade.

The Ultra Racing Rear ARB is 19mm while its replacement ARB is 23mm. The new ARB came from a JDM DC2 Integra Type R. Take note that JDM ITR ARB is 23mm while USDM ITR ARB is 22mm. Both will fit directly into the EG without problems (provided your car has the mounting points and mounting hardware).

Even though the DC2 ARB is thicker than the UR, there is still an advantage to installing the UR. You don’t need to have a rear subframe brace… the 19mm of the UR bar is basically the max u can go without a subframe brace and not cause your subframe to tear. Anything thicker (like the DC2 ARB) will require a subframe brace as the subframe on the Civic EG (and EKs as well) are pretty thin to handle that much stress. So the 19mm is the best bang for buck to avoid more money being spent on a subframe brace to avoid tear-outs.

Luckily I have already installed a subframe brace as you can see in previous posts. Mine is a replica of the ASR brace. Looks almost exactly alike, just not finished as nice. Works about the same, though the original ASR would probably work better with stronger components used but at slightly more than twice the price of the replica. Why did I get a replica? Well original ASR is almost impossible to find in this country as they don’t really have a presence here. And the only place which I’ve only heard of selling originals is about a 4-5 hour drive away. So yeah….

If you intend to install the Type R (DC2 or EK9) ARB into your Civic EG (or EK) I STRONGLY suggest getting the subframe brace. Easiest to find in Malaysia would be the replica ASR brace. Or from the knock-off brand “Jasma”…seriously…skip the Jasma and get the ASR. If you’re willing to order online, there are other brands (which obviously includes original ASR) which has subframe braces…. Off the top of my head…

- ASR
- Function 7
- BlackWorks Racing
- Beaks

They all look hawt right? Take note that I placed the Beaks last on purpose ha ha ha ha.

Anyway, on to the pix…

Banshee jacked up and ready to go…Short stoke!!


The Ultra Racing 19mm Anti-roll bar removed and put side by side with the DC2-R 23mm Anti-roll bar for comparison


A closer comparison between the 2 ARBs


Now look at the difference of the sizes of bushing and mounting C bracket… the JDM DC2-R is monstrous compared to the UR.


Final installation of the DC2-R ARB on Banshee… that’s khguan doing the work. He complained that in all his yeas installing an ARB, mine is the first one ever that he had to remove the rear muffler ha ha ha… this is coz the screws on the ASR brace were too long to remove with the muffler still on.


Banshee on all 4s with the DC2-R ARB installed..


The new thicker rear ARB did make the car feel stiffer to roll in corners. Looks like the thicker size is doing its job. And that’s a good thing. Me likey!


Now remember earlier I said to skip the Jasma brace and go for the ASR? Well here’s one reason to go for the ASR instead of the Jasma.

Take note of the mounting points for the ARB on the ASR below… Top is 19mm and bottom is the 23mm.


Notice how the 2 mounting holes are different? This is good coz then at least u don’t have to worry about mounting points on the brace itself. As you can see it will be able to fit BOTH 19mm and the bigger 23mm bars.


Now below is a picture of the Jasma brace I found online (credits to the original owner)… looks to me theres only mounting holes to fit 1 size… and I don’t even know what size. So you decide. I still would go for the ASR. I don’t know how much the Jasma costs… and I seriously don’t even wanna know.


As for EA Autoworks, both drexchan and khguan were cool. Didn’t get a chance to speak to howiechoo though. Never met him before so not sure if he was there. Both doods were nice to chat with and were funny chaps. Especially drex who for some reason kept tripping over everything LOL!

The shop itself is pretty clean as far as workshops go. There wasn’t much oil on the tiled floor and it wasn’t slippery. Parts were stacked in a simple way but everything looked to be in their place.

Service was good. Price is decent. Aftersales support is good from the feedbacks and online posts I’ve gathered (this was only my first time there).

The only complaint I have about EA Autoworks is the fact that their toilet is FILTHY! Yes, I said it with a capital F,I,L,T,H and Y with an exclamation mark.. But its not the kinda filthy from people shitting or peeing all over the place…but everything was black from all the oil on and around them. And it also had a bad odor. Not a toilet I would wanna use. The reason I mention this is coz I have bowel problems and tend to have a tendency of running to the toilet quite abit and at the worse times. So a decently clean toilet is EXTREMELY important to me. Thankfully at the time I didn’t have a need to go but just went in the toilet to wash my hands…

I seriously hope the EA guys would do something about it. They need to keep in mind that their customers tend to be there for long periods at a time so basic amenities like a toilet should be well kept…Even the workshops in Sunway which are usually very busy (especially on weekends) have clean toilets. Some of the toilets there are almost spotless. EA guys, you seriously need to do something about this.

UPDATE: It seems that the EA guys have listened to the complaints and have done a serious cleanup of their toilets. Kudos to them. They even posted a picture of the cleanup on their facebook.

Now the main thing is to keep the toilet clean. At least now I wont have any 2nd thoughts about going there :)


For the service, price, etc etc EA is definitely a shop I would go back to… but the condition of the toilet would make me seriously think it over (but would probably still end up going while making sure my tummy is empty).

As for wat madman20 did at EA…..ask him yerself if ur curious :P

Monday, February 21, 2011

Some Fixer-Uppers for Banshee

No mods this month... as I kinda used all my cash to get muhself a pair of brand spanking new Motorola Defy...costs RM999 per piece with Maxis' 2 year contract. Bought two, one for me n one for muh lovely wife.

Some might say not worth it to sign up for Maxis bla bla bla...but truth be told, I’ve been with Maxis for so long, I have no interest to change now or anytime in the future. Plus, my number is one of the first batches of Maxis hotlink prepaid (but has been converted to Postpaid a few years ago)…so you can imagine how old the number is…

Anyway, back to the topic. No mods this month for Banshee…but there are some fixer uppers done to her this past month…4 to be exact… 1 has been annoying me since I got the car…2 unintentional but had to be done, and the last one was simply coz it was time.

Before we begin, I do have to apologize for the quality of the pix. Most are taken in bad lighting conditions and the camera was a 5mp on the Motorola Defy. Definitely no match for my C905’s 8.1mp Cybershot, but during the times the pix were taken, the C905’s battery was dead… so live with it.

So lets start with the easy one…

1/ Bought new wipers for muh Banshee…this was simply coz it was time…
I’ve never really been much of a wiper brand person…so I just use whatever wiper brands that work… and I mean those that can wipe REALLY well… I’ve even used some fake BOSCH boneless wipers and that cheap fake wipers lasted over 2 years in Cutie Pie and gave excellent visibility when it wiped. I really liked those cheap wipers and were really impressed by them….

So this round, I decided to try something even cheaper hahaha… you know when you go to Giant or Tesco or Carrefour there are some stalls that sells many different kinda things? Well one of the stalls sells wipers for cheap @ RM10 per piece. So a pair is RM20 (in case some of u get confused). Cheap eh? Though I’m not sure of the material…but at RM20…gotta be Rubber right?


As you can see…the wipers are the boneless type wipers. My favourite kind. Coz these type of wipers look really neat when installed. Keeps the clean look of the car.

As for how the wiper performs…I truly have no idea…I bought it weeks ago but have not had the chance to drive it in the rain. When it rains, I’m usually in the office…Since I bought it, I have only used it for ONE wipe. That’s it. Yes, seriously…ONE. And that was coz I was driving under a flyover and a drop of water came to my screen. But judging by that ONE wipe…it was alright ;)

2/ Next up…unintentional but had to be done…

Heres a pic of Banshee…notice anything not right?


If u guessed it right… u get 10 points!

Yes, the passenger side windscreen moulding went missing! (Forgive the dirty fender, more on that at the end of the post)


Don’t know when it happened exactly, but I do know why. A few of the clips you see still attached to the frame were broken. That side of the moulding has never really sat properly so its somewhat of a blessing in disguise that it came off.

Consulted a few friends and they recommended either LHS in Jalan Ipoh or Exceptional Autoparts in Glenmarie to get the parts. And since Exceptional is MUCH closer to my apartment than LHS, Exceptional it is then!

To my surprise they had it in stock. Surprised coz the EG is a pretty old car and I was told that Exceptional caters more towards newer models. But hey, they had it and I was so happy that I emptied out my wallet and bought it @ RM180. Sadly, they only accept cash.

However, I forgot to buy the clips..and even if I remembered, I didn’t have the cash. I only remembered about the clips when I went to the guy who painted Cutie Pie to help me install. He said since the clips are broken, he wants to just put silicone glue to ensure the new moulding doesn’t fly off… it was fine by me. I had no intention of removing the moulding anyway. Unless necessary that is…which by then ill probably have to rip it apart and buy a new moulding. So lets pray that everything stays good :D

Heres a pic of the new moulding installed


Now whenever I look at the moulding, it makes me wanna buy a new moulding for the top too…hahahahhaa. The drivers side is still good thank god…

Next…

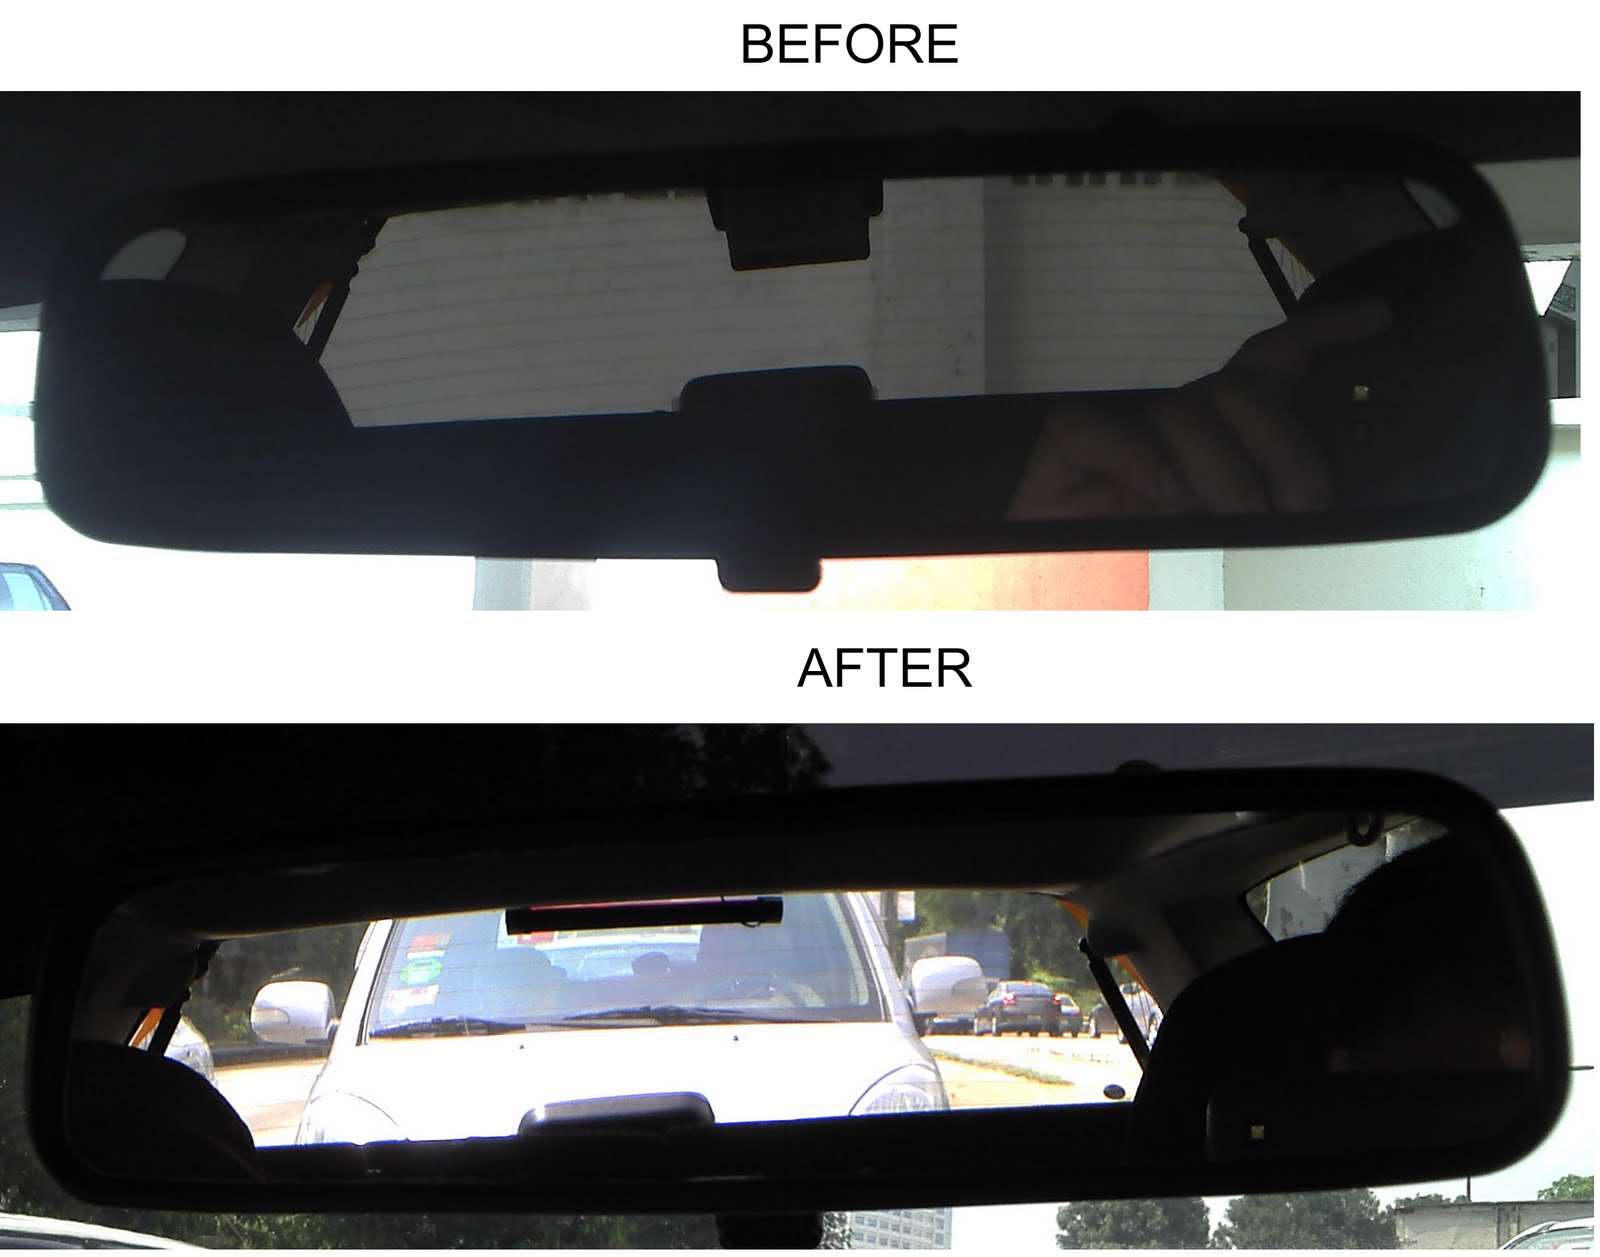
3/ The thing that has been seriously bugging me…my third brake light…

Heres a pic of the brake light that came with the car… see that fat ass on it??


I really hate that fat ass… and heres the reason why…


As you can see my view in the rear view mirror is seriously impaired coz of that fat ass…I really couldn’t stand it…so I went hunting for a nice thin rear brake lights… wanted those that uses bulbs but couldn’t really find a suitable one coz bulbs somewhat require a fat ass too…so I settled for the thinnest type available, LED brake light.

Even then I had difficulty finding one that suited my needs…until I decided to follow a friend’s suggestion and go to Brother’s to see if they had any. And lo and behold…I found exactly what I wanted…nice, long and more importantly thin LED brake light with adjustable legs that’s mounted via double sided tape.

I bought this for RM35 at Brother’s


Here you can see the “adjustableness” of the legs…


(don’t pray pray..its Super Intelligent! Hahahaha)

And here are (crappy) pix of the brake lights installed…notice that I didn’t connect the wires directly and used connectors instead. More on that in abit


Brake lights on…looks pretty decent eh?


In case anyone is confused… the bottom row of the 3rd brake lights are the real ones and the top row is a reflection…..duh!

I used connectors to make my life easier down the road. LED brake lights like this has a tendency of dying off 1 at a time. Either totally dead, or blinks til it dies….also, this is from Brother’s and everyone knows the quality of the stuffs in Brother’s are somewhat “questionable”. Which is why I didn’t even bother looking for the lights at Brother’s in the first place. So the connectors are in preparation for when that happens (hopefully not so soon). All I need to do is unplug the connectors. Crimp in new connectors (which I have a lot of and are also easy to find in hardware shops) onto the new unit and stick it on.

And heres a before and after pic of my rear view mirror. It may not look like much…but this change made a HUGE difference to me. I can see things MUCH clearly now.


I also recently changed my steering rack + crossmember. Hence u see the dirty fender in the earlier picture. My steering rack was leaking, causing me to top up on power steering fluid every now and then, so I got a pretty decent quote from Avantech for the entire crossmember set and steering rack and went ahead with the change. The new crossmember set came off a JDM Integra DC2 Type R. This also includes the front anti roll bar from the DC2-R. This change actually gave me more turning radius… with the previous rack I only managed to get 1 round of the steering (from centre) before lock. With this, I managed to get 1½ rounds. And since I have to make a tight U-turn everytime I wanna go home, the higher turning radius is much appreciated.

Since the new set also included the front anti roll bar, my previous anti roll bar, which is also from a DC2-R was taken out and I now have an extra set for sale.

My previous TYC headlamps are also up for sale. Links to the ARB and TYC sale ads are here:

[WTS] DC2 Integra Type R FRONT Anti-Roll Bar

[WTS] TYC Projector Headlamps - Civic EG

Thats all for this post, folks!

Monday, January 31, 2011

Banshee's Screaming Dyno 29012011

Date: 29th January 2011
Time: After lunch (burp)
Location: GT-Auto, Sunway.

A fellow LYN forumer by the nick of "kcng" managed to organize a group dyno day @ GT-Auto for his Satria Neo Club with very good prices. So I decided to "piggyback" into the group as well. I was curious to see if Banshee was making the power it should. This could tell me if the engine is healthy or needs work...

I didnt manage to stay the entire session as I had an appointment. But I heard that the dyno went pretty smoothly and was a success. Everyone was happy with their results. Well, mostly everyone (have patience Azuma, slowly fix up the issues). And the best suprise of the day was a Proton Gen2 CPS. It was bone stock and even had the cat still on. By just changing the air filter and spark plugs, he managed to get the 2nd highest figure (for Proton engines) of the day that I know of with 120HP. Extremely impressive. Congrats on the results Paul (owner)!

All the cars that attended that day were NA based cars. Mostly Proton's Campro engines with a few Proton CPS engines. There was also 1 MIVEC & 1 VTEC to complete the group...Unfortunately there were no turbos in the group. Would have been nice to have a turbo to give a nice good mix.

Highest figure of the day (that I know of) for Proton engines (and 3rd overall) came from a Satria Neo. Non-CPS. Just the normal Campro. Managed to push out 134.77HP with 151.90nm Torque. HP figure is almost reaching stock Big V B16A on wheel figures and Torque figure is already surpassing B16A on wheel figures... This is impressive, especially for a campro. Whats done to the car, me dunno. Owner has a very decent result, but I guess it still hasnt reached his target with all the mods hes done to the car coz it seems hes slightly disappointed with it...though not as disappointed as Azuma with his Waja CPS...Poor boy...Anyway, the owner of the highest Proton engine figure was kcng himself. The organizer. You may not be happy with your result, but its still an impressive one by Campro standards. Its also pretty decent by B16A standards!

The 2 highest figures came from the only 2 non-Proton engines. 2nd place was a Satria 4G92 MIVEC 1.6. Even with tuning issues and running very rich. The MIVEC managed to get a decent & healthy 147HP. He just needs some management and tune it properly and I believe he should be able to gain even more power from his MIVEC. and after that perhaps a high compression 4G93 block? Heh heh heh

Highest (and loudest) of the day was Banshee, which was also the only non-Proton car there. But of course, I was also the only non-1.6L engine there with a 2.0L under the hood. I would cut my own throat with a blunt plastic butter knife if I didnt get a good result there with a 2.0L VTEC. heh

Heres some pix of Banshee during the dyno..


And heres a video of Banshee's Dyno runs... it was so friggin loud. With all the other cars, people were standing around talking etc etc... But with Banshee's scream, almost everyone had their fingers shoved into the ears, and a few that actually walked out...I couldnt cover my ears due to the video, and I was standing right next to the source of the noise, the side plant hahahaha...Forgive the shaky hands as well as the quality. Vid was with a Sony Ericsson C905 Mobile Phone.

I strongly suggest turning down your volume before playing the vid and slowly increasing it as it goes. Coz the video even starts off pretty loud.


Here's the result of Banshee's dyno


I spoke to Thomas (who was the guy doing the Dyno runs) and he suggested that i engage my VTEC a lil earlier and also go higher compression. Good. Coz its all part of the plan...heheheh

Overall I am happy with the result Banshee got. Though I was hoping for 20kgm torque, getting almost 19 is also pretty decent in my book. Especially considering this is the torqiest (is that spelling right?) car I've ever owned.

Thanks kcng for organizing and also thanks for allowing me to piggyback in the event!

Tuesday, January 25, 2011

Let's Begin Blogging about Banshee

So…ive decided to begin blogging about Banshee…my Civic EG6.

I haven’t done much to the car and it still remains pretty much the same but ill still post what I have done previously as well as the latest update… will also post some extra pictures…

First up. The mod I did even before I got the car.


* Tein Type Flex suspension: Adjustable Hi-Lo & Soft Hard.
* Blox Lower Control Arms
* Ultra Racing Rear Anti Roll Bar
+ Replica ASR Rear Subframe Brace.

Those marked with (*) was originally on Banshee but Ram (ex-owner) took it out and sold it to a friend before selling Banshee to me. 2-3 days before I collected the car, Ram’s friend called him and told him that he decided not to install those parts and wanted to sell it off. So Ram called me and asked what suspension I wanna put in the car.. and once he heard I said “GAB SS” he immediately jumped and made an irresistible offer so I jumped too! Hahaha. I also decided to add the ASR subframe brace one shot while installing all the (*) items. And damn the rear looks hawt as hell!!!

Next up, new headlights… previously it had TYC projector headlamps. I didn’t much like these headlamps coz the low beam was utterly useless and I have to drive around with high beam. They do look sexy as hell on the car, but for me…its function over form (usually). So what I did was I decided to buy the Crystal smoked lamps. The brand I got was Depo from HERE. The price of the lamp complete with side markers (aka signals) was RM480. Installation and bulbs costs separate.

Due to the TYC, I had to purchase some socket or something for the small first lights. And in the end the total cost came up to RM600 for headlamps, signals, bulbs, sockets, installation bla bla bla. Installation was done at the address at the website I linked above.

Before with TYC headlamps. These are all the pix I have since I didn’t have a properly functioning camera when they were still on…Plus pix were taken at bad lighting conditions and my only properly functioning camera is from the Sony Ericsson C905 mobile phone. So don’t complain about quality and what not…


Pix of the car after the new headlamps


Personally, I think the new headlamps looks hell of a lot hotter than the TYC. Even my wife agrees and the first she said is that it looks a lot cleaner. And I of course agree with that statement.

For now, I have yet to drive it at night, I did some adjustments last night at home but didn’t drive out the car til morning. And since its 930pm now and I’m still in the office, itll be my first run with the new headlights at night after adjustment. Only thing is, the roads I’m using are very well lit. ha ha ha ha. If I get a chance to run through dark roads at night with the new headlamps, ill update if I remember (and of course get the lights adjusted properly).

If you’re wondering why I didn’t go for original JDM Stanley lights, its simply because I prefer this one better. I might go JDM one day, who knows, perhaps with USDM signals or Amber signals or whatever, but for now, I LOVE the current headlamps :D

One thing to take note when purchasing headlamps for ur Civic EG. MAKE SURE U GET THE RIGHT SIGNALS. The headlamps are useable for both 2 door and 4 door. But the signals are specific. U CANNOT use 4 door signals in a 2 door and vice versa. So when I bought mine, I made sure that its for the 2 door. They do have the 4 door version, just not sure if the pricing is the same.


Anyway, wanna put more pix of Banshee..more towards the sideplant. From the first pic u can see the Spoon Street muffler which is very quiet and very restrictive.. the Spoon is good for police road blocks etc... but for daily driving and for some fun...i just pull a cable in the cabin and this opens up and goes BBWWAAAAAHHH!!!


(yes, it’s a throttle body :P… custom sideplant..comes out right behind the drivers door... )

This setup is good for “legalizing” ur car when u need it and have extra oomph when u wanna have some fun… only downside is, ground clearance (depending on how the pipe is setup)… for me, I have to put my car at 2 fingers front and back, and I still get clearance issues on some speed bumps. Oh well….

Lastly, the latest pic of the engine bay I have.


OK. Thats it for now..

Next target would be bucket seats. Will most likely go for the Recaro SR3 from DC2-R. At least its original and quality is assured. My initial plan for Replica Bride Low Max GIAS has to be scrapped seeing how it’s a 2 door car and practicality needs to be taken into account. Like I said earlier, function over form first. Theres also the possibility of Replica Bride Cuga….But we'll see…

Tuesday, January 11, 2011

mADmAN's Perodua Kelisa: My Car Evolution Part 08

[Originally Posted: Aug 29, 2009]

Round 8 Update…this will be the final update for Cutie Pie.. coz this is the last mod I did to the car and I have sold the car off as mentioned HERE

So on with the update..


After another long period of no modding… I’ve finally got muh hands on what ive been wanting for a loooooooooonngg time… which is a brake upgrade…so heres wat I posted…

its been so long....now its FINALLY time for a new update....ive been wanting to upgrade my brakes for a VERY long time and sometime ago i posted this in K2Oc and Kelisaclub Forums....its an ad i scanned from a magazine after a K2OC forumer told me about it...


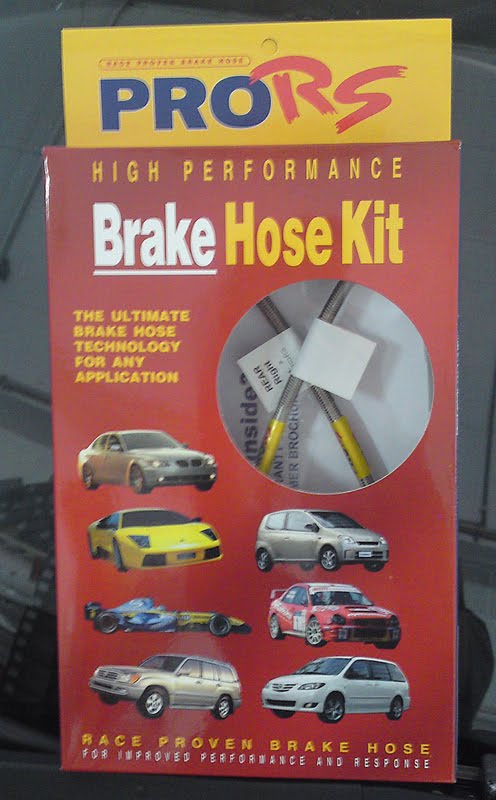
and today....i went to the shop and bought the sports type package which consists of a pair each of Myvi's
1/ Maxtech calipers
2/ Maxtech Vented, slotted & Cross drilled rotors
3/ Maxtech Brake pads.


then went to Kaitenaz racing...my friend's shop in sunway and purchased this...


heres a pic of the calipers, rotos, brake pads and steel braided hose installed. i installed everything one shot...also used Ferodo Dot4 brake fluid while changing the hoses


didnt take pic of the hoses installed at the rear coz its too small oso anyway..


how the new brakes looks hidden behind the 15" X


so now my car is equipped with front myvi aftermarket rotors, calipers and steel braided hoses....and drum brakes for the rear "sweat"...really need to change the rear oso man..heh (ADD: I didn’t change the rear hahahah)

brake feel now is SOOOOOOOOOOO much better from previous..i was having problems with my brakes after a trip to genting...it started squealiing everytime i braked and it wasnt biting as much as before...even on the way down oso i experienced severe brake fade. after that experience..i decided to eat bread this month and upgrade my brakes :D


anyway...for those who wanna know...the maxtech set is direct plug and play to kelisa and should be the same for kenari as well.

piston is a single pot...brake pads duno the rating..but good enough so far.

cant comment on brake bite as yet...as i was told to take it easy for awhile and let the brakes "run in"

ADD: abit of update… the brake bite is awesome with this setup… the car will stop as and when u want it to…pedal is super with almost 0 spongy feel… even did a trip up n down Genting Highlands and brake fade was much reduced compared to stock and there was no squealing after and the bite was still bloody good!

This upgrade was expensive….but worth it… especially considering ALL the parts were brand new.. u can mebbe get other car brake kits 2nd hand for the same price like a Civic (B16A) or Levin etc etc…but again, those parts are used and this is brand new…still worth it :D


ADD: as mentioned, I have since sold the car… below is a pic I’ve posted before..but want to post again…it’s the last moment right before handing the car over to the new owner…

I miss u Cutie Pie.. and thank you so much for the many years of service, reliability and loyalty. Hope the new owner treats u as well as (or better than) how I treated u…so that you may give them the same type of joy u gave me and my wife… and also Raisa.

mADmAN's Perodua Kelisa: My Car Evolution Part 07

[Originally Posted: Jan 08, 2009]

Round 7 Update

After a long while of not modding the car, I finally got something new heheheh…

An adjustable caster bar... to find out wat it does…click HERE, scroll down a lil bit and click play

most of us know when we lower our car... one side of the rear rims will go more inwards compared to the other side, previously i used a spacer to help even things out....now with this bar...adjusted it nicely already and also removed the spacer.... the rear wheels are evenly aligned with the body now

pictars...

(only had phone cam when took this pic)


after installation...


where the magic happens....


been using it for a couple of weeks now with no problems and handling characteristics of the car hasnt changed after installing the bar and removing the spacer. guess this helps with aesthetics...

in case anyone is curious.. i got mine from HERE. hes based in KK Sabah.


ADD: since I installed it I’ve never taken it off…as mentioned above, there were no change with handling etc etc… n the bar remains well n good where it is.

I also don’t have pix of the entire rear with the bar installed… the only pic I had was uploaded to imageshack and imageshack has a tendency of making pix disappear especially if those pix hasn’t been seen/accessed in a long time..

EDIT: click HERE for Part 8 (Final Part).

mADmAN's Perodua Kelisa: My Car Evolution Part 06

[Originally Posted: Oct 14, 2008]

Round 6 Update

got new stuff for the car

KOMO automatic bonnet lifter Very Happy

bought it for RM55 from Lowyat.net forums

ADD: Before I post pix..lemme just say that the bonnet lifters in my car were utter crap… cool…but utter crap.. reason why is coz it was too strong… everytime I open the bonnet it will snap the bonnet up…so I kept being afraid that the bonnet was gonna pop off or something like that…

Also they made the rear of the bonnet sit up abit…not much..just a lil bit. But then when that happens, the front goes down… so the front where the bonnet hook is at is slightly dented upwords due to closing the bonnet.

I have taken them out… and used back the stock bonnet lift and hold thingy… much better imho…..

Take note that this happened to my car only..the seller who I bought it from also sold one to another kelisa.. and that other kelisa had no issues whatsoever with the bonnet lifters… so either my installation was crap…or it just didn’t suit my car or…dunno la…

So on with the pix… (they only had it in yellow at the time)


also got myself a used UR Room bar a couple of months ago from a forumer here....but its so dirty so i decided to clean it up first before installing.... mebbe give it a nice black spray before installing it.. only problem is...i feel so lazy hahahha

ADD: as mentioned in my previous update… I got the UR Room Bar…ive installed it (without cleaning it :P) and theres no pix of it installed unfortunately… back seat clearance is pretty much alright with the Room Bar. The Kelisa is a 4 door after all…


That’s it for Round 6 folks!

EDIT: click HERE for Part 7.